Scenarios
 Version 1.0.5
Scenarios are variations of rows, variables, and/or outputs in a model that enable the user to test the results of an alternate set of assumptions (e.g., a recession in the next 12 months), choices (e.g., sunsetting an old product earlier than expected), or situations (e.g., increased tariff rates). Unlike in Excel or Sheets, in which scenario handling requires creation of net new infrastructure in often across multiple sheets, scenarios in Parfera are automated and controlled by on-off toggles in the model options section above the grid.
 Version 1.0.5
Create a scenario
Section titled “Create a scenario”Create a new scenario by clicking the Scenario button in the elements tab of the ribbon, or the “+ Add” button at the bottom of the scenario list.
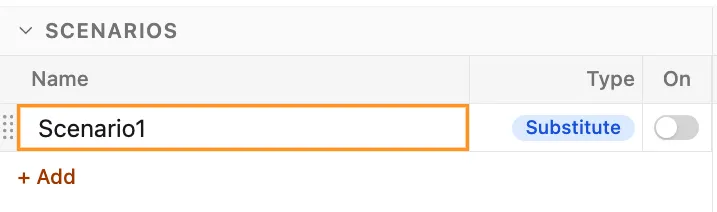
Each scenario includes a name, type, and on-off toggle. Parfera supports two types of scenarios, Substitute and Layer, shown in the type column of the scenario list. Click on the type indicator for a scenario to switch between types.
 Version 1.0.5
Substitute Scenarios replace original values for a row with new scenario values (e.g., if base case 2023 Revenue = 2,000 and Scenario 2023 Revenue = 1,000, then when this Scenario is turned on, 2023 Revenue = 1,000)
Layer Scenarios sum the original values for a row with new scenario values, they are especially useful when evaluating multiple scenarios that can occur in combination (e.g., if base case 2023 Revenue = 2,000 and Scenario 2023 Revenue = 1,000, then when Scenario is turned on, 2023 Revenue = 3,000
Add row to scenario
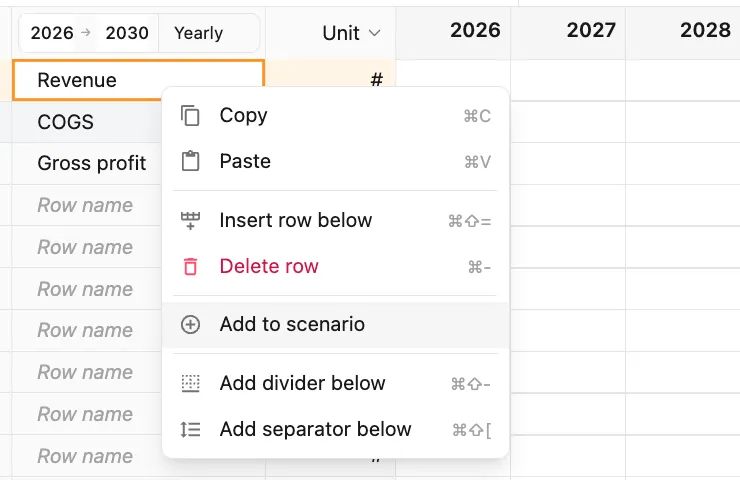
Section titled “Add row to scenario”Add a row to an existing scenario by right-clicking on the row and selecting the “Add to scenario” option.
Note: The file must include one or more scenarios before the “Add to scenario” option will appear.
 Version 1.0.6
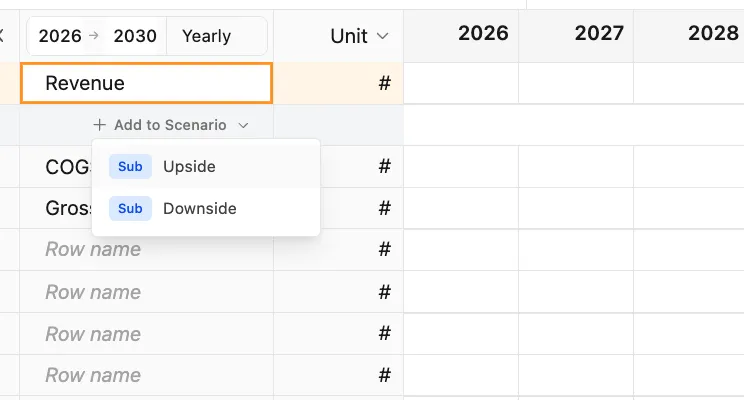
Next, specify the Scenario to add the row to.
 Version 1.0.6
Apply tools as normal to the new scenario row beneath the original row.
Add variable to scenario
Section titled “Add variable to scenario”Add a variable to an existing scenario by right-clicking on the variable and selecting the “Add to scenario” option.
Note: The file must include one or more scenarios before the “Add to scenario” option will appear.
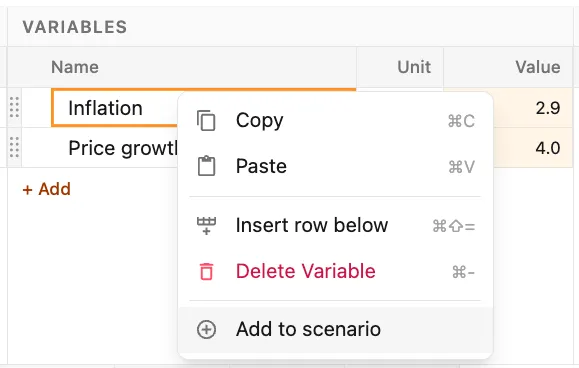 Version 1.0.6
Next, specify the Scenario to add the variable to.
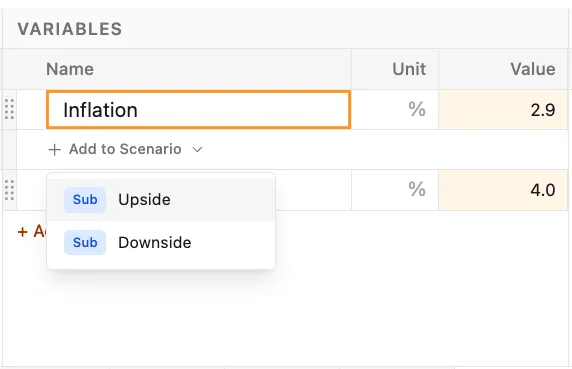 Version 1.0.6
Enter the desired scenario value for the variable into the new scenario row beneath the original variable row.
Note: Variables follow the same logic as rows when calculating both Substitute and Layer scenarios.
Remove a row or variable from a scenario
Section titled “Remove a row or variable from a scenario”Right-click on the scenario row of a row or variable and select “Remove from scenario” to delete the child row and remove the row or variable from the specified scenario.
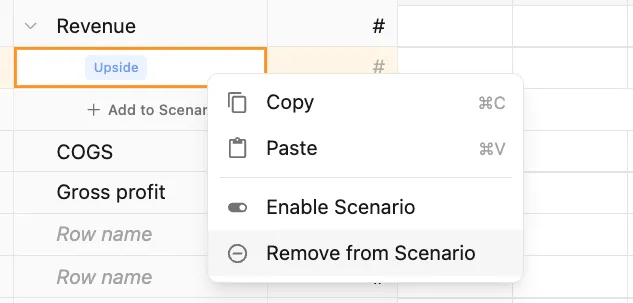 Version 1.0.6
Edit a scenario
Section titled “Edit a scenario”Edit the name or type of a scenario directly in the scenario list.
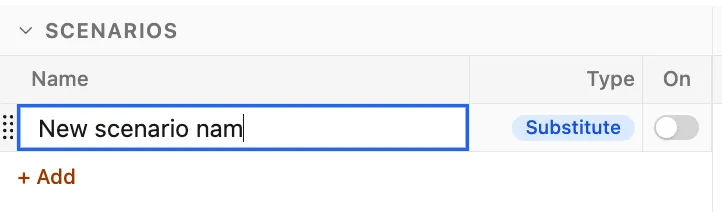 Version 1.0.5
Edit scenario values for a row by editing the tools applied to the scenario row.
[Closeup of tools applied to
Edit scenario value for a variable by directly editing the value in the scenario row beneath the variable.
Delete a scenario
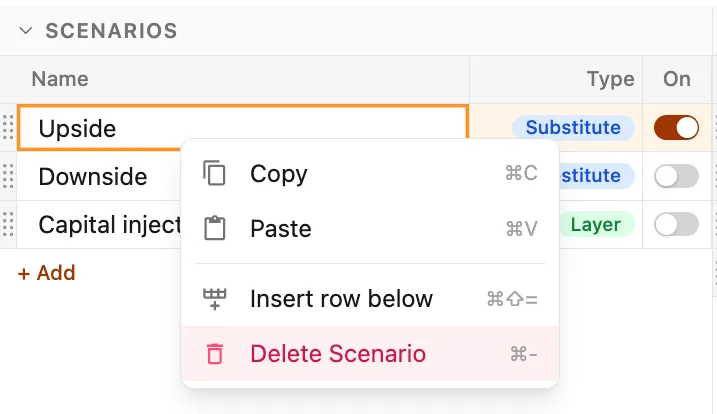
Section titled “Delete a scenario”Right-click on the scenario in the scenario list and select the Delete Scenario option to delete an existing scenario.
 Version 1.0.5